Recipes

The Perfect Almond Flour Banana Bread (Grain-Free + Paleo)

Paleo Almond Flour Banana Bread

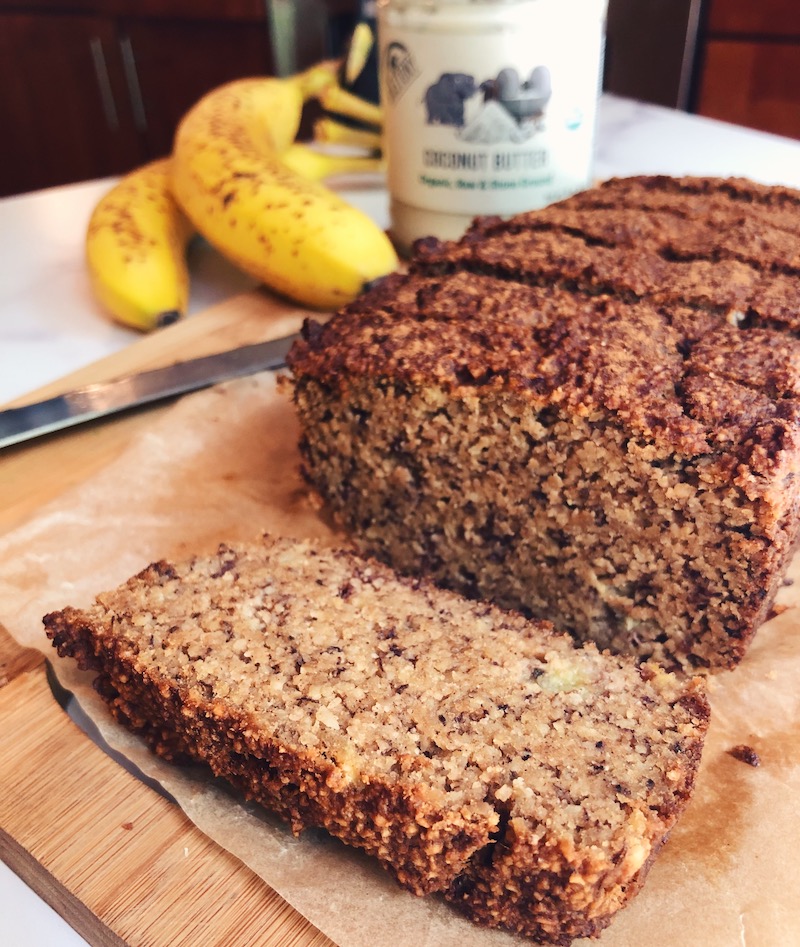
This banana bread is perfect - moist and melt-in-the-mouth, low in sugar (only 2 tablespoons of added maple syrup), and makes for a delicious breakfast, snack, or even healthy dessert. It's also made with almond flour so is entirely paleo-friendly, gluten-free, and grain-free. You can make it with pastured eggs or go vegan and make a flax egg mixture (1 tbs of ground flax + 3-4 tbs of water = 1 flax "egg").

Get ready for your kitchen to be filled with the sweet aroma of freshly baked banana bread - is there anything better??

Serve with almond butter or coconut yogurt and some fresh berries from the farmer's market for a delightful, summer-friendly treat.

Paleo Almond Flour Banana Bread

The Recipe

Paleo Almond Flour Banana Bread

Yields 1 loaf

Dry ingredients

2 cups blanched almond flour
1/2 tsp baking soda
1/2 tsp baking powder
1/2 tsp cinnamon
1/4 tsp nutmeg
1/8 tsp Himalayan salt

Wet ingredients

3 very ripe, spotty bananas
2 pasture-raised eggs or flax eggs (if using flax eggs you may need to add a splash of extra water as flax absorbs liquids, unlike eggs)
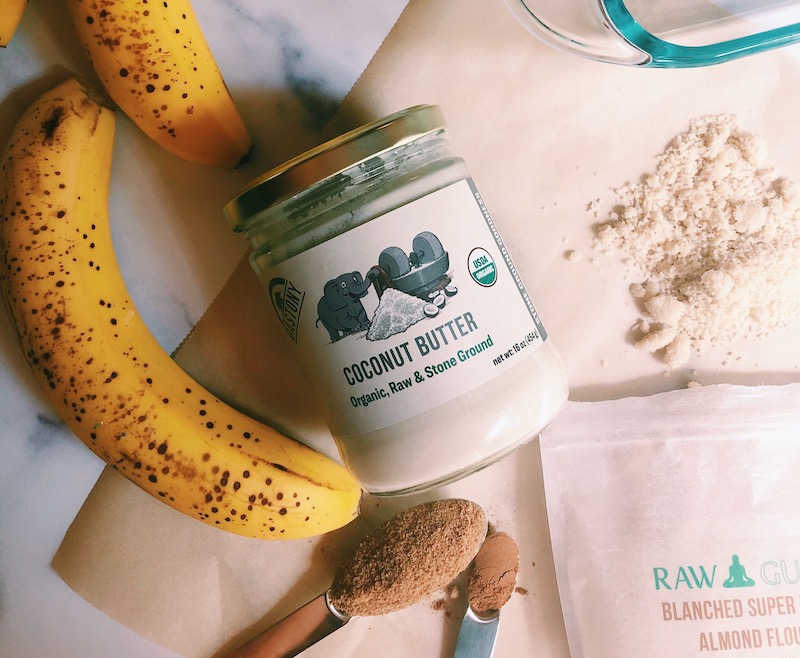
1/4 cup melted Dastony stone ground coconut butter
2 Tbs maple syrup

Steps

1. Preheat the oven to 350F and grease your bread loaf pan with a little coconut oil, or line with parchment paper.

2. Mix dry and wet ingredients separately, then combine in a large bowl.

3. Pour mixture into your prepped loaf pan and pop it in the oven for 50 minutes. The top should be starting to lightly brown and a toothpick should come out clean when stuck through the center.

Be sure to let it sit for at least an hour to cool before slicing. It will carry over cook and needs time to fully set or it will be too soft to slice.

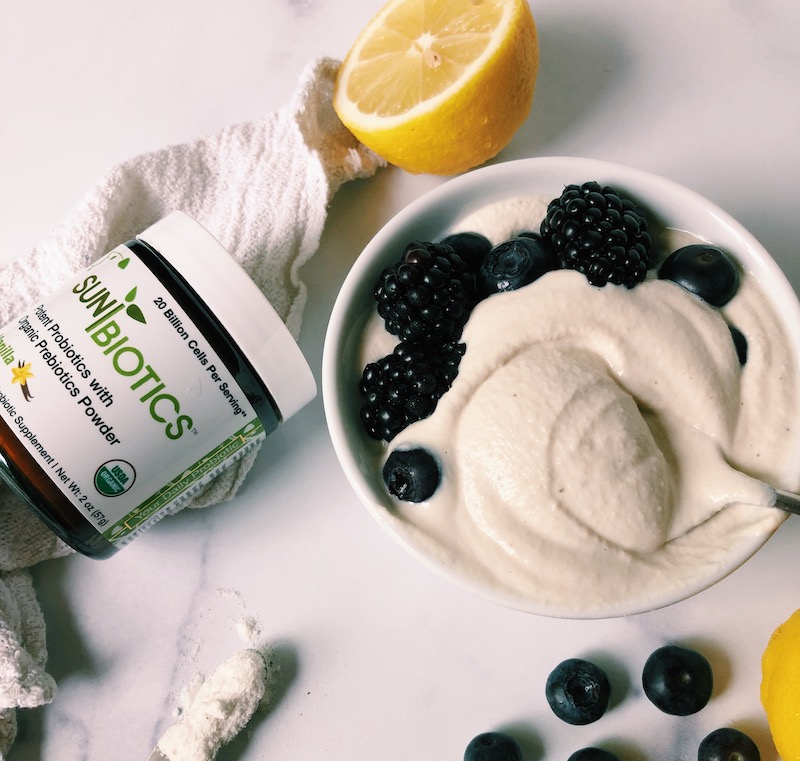
Get Your Dose of Gut Friendly Flora with this Lemony Cashew Probiotic Yogurt

This “yogurt” isn’t cultured like a typical yogurt at the store but has plenty of probiotics in it thanks to our Sunbiotics vanilla probiotic and prebiotic powder. If you’re looking for a delicious way to sneak in some extra love for your gut, this creamy and lemony plant-based yogurt is a great option that doesn't require any special kitchen equipment aside from a blender. Serve with fresh berries for a yummy breakfast or snack, or layer with granola + fruit for a parfait. 

Sunbiotics probiotic formulas are certified organic, food-based, and contain the top strains of beneficial flora to help support digestion and overall gut health. Unlike many probiotic formulas on the market, they are free of all additives and common allergens like wheat, soy, dairy, and corn. They are shelf-stable and activated in the GI tract once ingested - which means they're also travel friendly (no refrigeration required).

Try our probiotics for adults in powder form and chewable tablets, or if you’re looking for a great option for kiddos try our Just4Kids bountiful berry powder.  

Lemony Cashew Probiotic Yogurt

The Recipe 

Raw Lemony Cashew Probiotic Yogurt

Makes roughly 3 cups

Ingredients

2 cups raw cashews, soaked

1/3 cup Dastony stone ground raw coconut butter

1 tsp vanilla extract

Juice from 1 large lemon

1 cup purified water

5 drops therapeutic-grade lemon essential oil** (or use the zest from your lemon as long as it's organic)

2 Tbs raw organic honey or maple syrup

1 tsp Sunbiotics vanilla probiotic powder

Big pinch Himalayan salt

 
Steps
 
1. Soak raw cashews for at least 4 hours to soften them(overnight also works). 
 
2. Blend all ingredients until smooth. If your coconut butter is very solid you can melt it using a double boiler method before adding it to your blender. 
 
Note: A high-speed blender will work the best to achieve the smoothest texture.   
 
The recipe will store in the fridge in an airtight container for up to a week.  

**Make sure you are using a therapeutic grade lemon essential oil like Young Living - not all essential oil can be ingested. 

Try This Tasty Orange Tahini Miso Dressing on Your Next Salad

Orange Miso Tahini Dressing

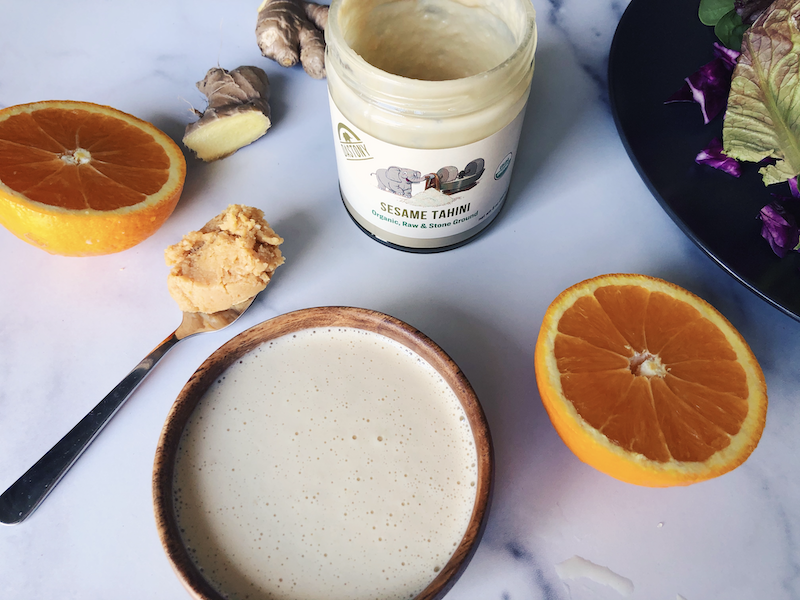
Say you're going to a desert island and can only take one salad dressing. Balsamic? Herb vinegarette? It's a tough choice, but in the end, we hope you choose a tahini-based dressing! Why? Because they're so easy, pair well with so many options, and always seem to hit the spot. And this Orange Tahini Miso dressing recipe is exactly all of those things - especially if you like to dress your veggies with that perfect flavor harmony of salty-sweet, creamy, gingery, and citrusy. This dressing has it all! 

Made with a base of ultra-creamy Dastony stone-ground raw sesame tahini, it can even be made without a blender thanks to the silky-smooth nature of stone-ground seed butter. That being said, blending is quicker and will lend an even smoother and more emulsified effect. 
 
Avoiding soy? Try using chickpea miso instead of a classic soy-based option - this can be found in most health food stores like Whole Foods or Sprouts near the tofu section. Look for unpasteurized miso as this will contain beneficial bacteria that help boost the gut.  
 
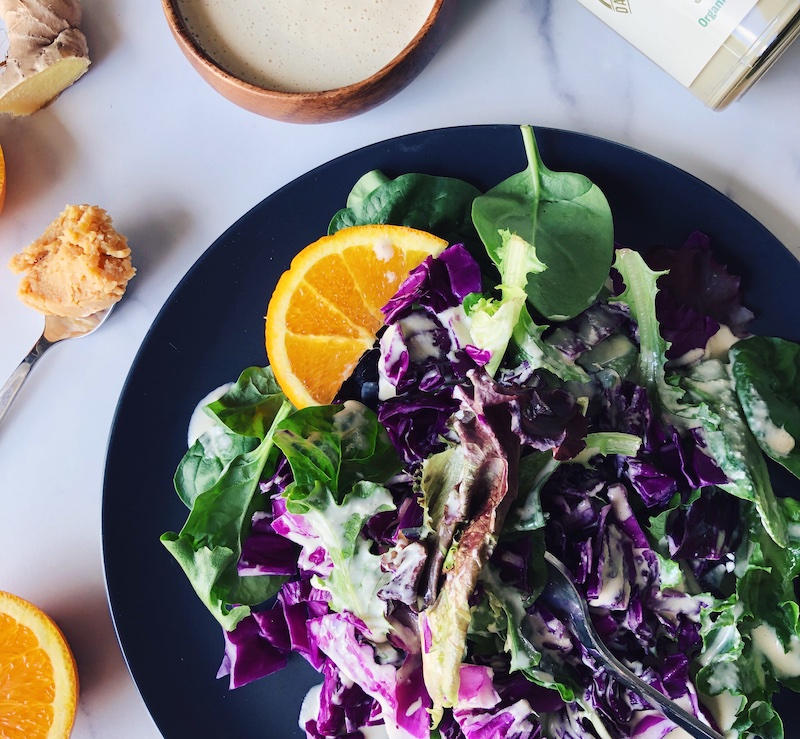
This would make the perfect dressing for a simple green salad like the one below, or perhaps an Asian-inspired salad with finely chopped kale, cabbage, green onions, julienned red bell pepper, and some peanuts or cashews for crunch. 
 
Orange Miso Tahini Dressing

The Recipe 

Orange Tahini Miso Dressing
 
Ingredients
 
1/2 cup fresh-squeezed OJ (try Valencia oranges - they're very juicy)

1.5 Tbs fresh lemon juice

1/4 cup filtered water

2 tsp soy or chickpea miso

1/2” slice of fresh ginger root, peeled and finely chopped

1 tsp maple syrup

1/4-1/2 tsp salt - to taste
 
Steps
 
1. Blend until smooth and serve with your next fresh salad. 

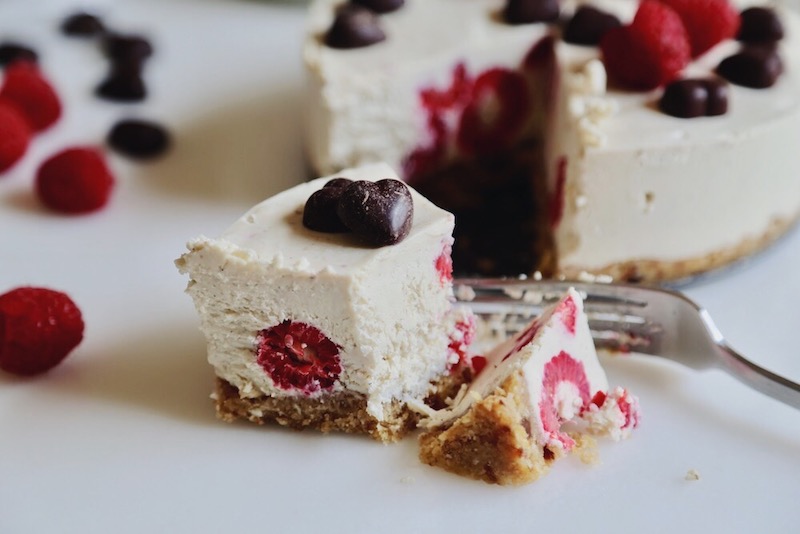
Boost Your Gut Health with this No-Bake Lemon Raspberry Cheesecake

No Bake Vegan Lemon Raspberry Cheesecake
 
Probiotic-rich foods are one of the most important things we can consume. After all, the gut is home to around 70-80% of our body's immune system in the form of an army of friendly microflora – there are trillions of beneficial bacteria living in a healthy gut. The benefits of consuming probiotics reach far and wide - they promote more complete digestion, help eliminate indigestion and stomach bloat, and keep unhealthy bacteria in check so we're less likely to fall ill, to name just a few. 

And if you're looking for a dessert that's friendly on digestion this is it - a dairy-free, gluten-free, refined sugar-free, nutrient-rich cheesecake that contains a generous amount of gut-friendly probiotics from cultured coconut yogurt and Sunbiotics organic probiotics to help replenish the digestive system. It also contains healthy fats from whole coconut butter to stabilize blood sugar, and contains very minimal sugar in general - there's just a little over ¼ cup maple syrup and seven dates in the entire cake.  The texture is decadent (so silky and rich!), the flavors are refreshing (lemon! Berries!), and eating a slice (okay, maybe two slices...) won't weigh you down or get in the way of your sunny springtime adventures. 

We hope you end up sharing your own cheesecake masterpiece with friends and loved ones this spring!

The Recipe

No-Bake Lemon Raspberry Cheesecake

Makes 1, 6” x 2-3/4” springform pan

Filling Ingredients

1.5 cups cashew nuts, soaked
 
1 cup unsweetened Natural COYO

1/2 cup melted Dastony Stone Ground Coconut Butter (not coconut oil, use whole coconut butter)

1/4 cup + 1 Tbs real maple syrup

1 inch of vanilla bean – the whole pod*

Juice of 1 lemon – about 1/4 cup

3 drops therapeutic grade lemon essential oil ** (or use the zest from one organic lemon)

½ cup fresh raspberries
 

Crust Ingredients

3/4 cup walnuts

1/2 cup blanched almond flour

7 medjool dates

1 tbsp of coconut oil, melted

1 tsp lemon juice

1/8 tsp salt
 
Topping (optional but a nice touch) - Rawmio Raw Chocolate Hearts

*if you do not own a high-speed blender, scrape the vanilla beans from the pod as the pod itself may be a
a bit too tough for the blender to break down fully.

**use therapeutic grade, organically produced lemon oil ONLY. Not all EO is of the same caliber, and
most are not safe to ingest.

Steps

Crust

1. In a blender or food processor, pulse ingredients together until they break down and bind together. You'll
want to be able to take a spoonful, squish it together, and have it hold its shape. Make sure all of
the dates are broken down as they are what help bind the crust.

2. Scoop crust into the bottom of a springform pan, and press evenly along the bottom only.

Filling

1. Soak cashews for at least 4-6 hours to soften. They can also be soaked overnight to prep for the next
day. Drain and rinse thoroughly after soaking.

2. Combine all ingredients except lemon oil and coconut butter in a blender carafe (preferably high speed
like Vitamix or Blendtec) and blend on a medium-high setting until very smooth – about 30 seconds.

3. Add gently melted coconut butter and lemon oil and blend again. The reasoning for adding these last is
the heat generated from blending may alter the flavor of these two ingredients. Adding the coconut butter
last also helps give the filling a more fluffy consistency.

Assembly

1. Pour filling over crust in a springform pan

2. Take fresh raspberries and place them on top of the filling, then with clean fingers or a utensil carefully push
them down into the filling so that they are completely submerged.

3. Place cake in the fridge to set for at least 1 hour. Store leftovers in the fridge. Cheesecake may also be
frozen but should be left to unthaw before serving for best flavor and consistency
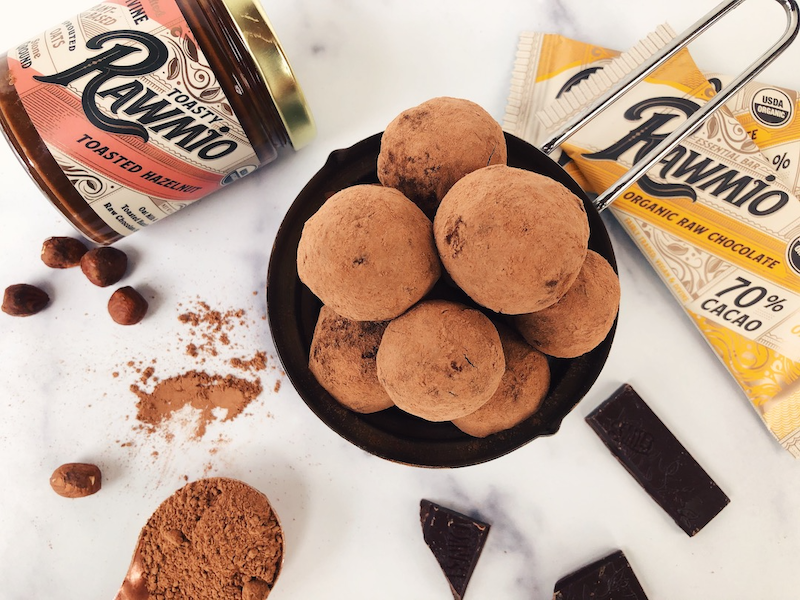
These Raw Chocolate Hazelnut Truffles are Rich, Decadent and Guilt-Free

Do you find yourself craving a dark chocolate fix on the daily? If so then being able to whip up your own drool-worthy chocolate confections at home can be a life saver. And it doesn't have to involve complicated steps or ingredients. In fact, you can make a batch of decadent raw chocolate hazelnut truffles with only 4 main ingredients. Yes, only 4!

These truffles can be made with any of your favorite Rawmio raw chocolate Essentials bars - orange, mint, 70% dark, 85% dark, or Keto. The steps involve finely chopping the chocolate bars, then gently melting the pieces together with Rawmio Chocolate Hazelnut Spread until liquid, stirring in some coconut milk and a dash of vanilla (and Himalayan salt if you like), then letting the mixture set for just a few minutes in the fridge to firm up. Once it begins to harden you can use a tablespoon, cookie scoop, or melon ball scoop to form your truffle mixture into balls.

This recipe makes 1 dozen truffles, so store any extras in the fridge or freezer so you always have a little somethin' to sink those teeth into when the late-night chocolate cravings hit.

The Recipe

Raw Chocolate Hazelnut Truffles

Makes roughly 1 dozen 

Ingredients

7 Rawmio Essentials bars, chopped finely
2 tbs Rawmio chocolate hazelnut spread - either Toasted Hazelnut or Chocolate Hazelnut
1/4 cup coconut cream
1/4 tsp vanilla extract 
a pinch of Himalayan salt (optional) 

1/4 cup raw cacao powder (for coating)

Directions

1) Start by chopping chocolate Essentials bars into very small pieces - the more finely chopped the chocolate the quicker it will melt.

2) Using a double boiler method, melt the chocolate pieces together with the Rawmio spread in a heat-safe bowl, being mindful not to overheat.

3) Stir in your coconut cream, vanilla, and optional salt, stirring gently until well combines.

4) Cover and let the mixture set in the fridge for 1 hour to harden.

5) Use a small cookie scoop, melon ball scoop, or a tablespoon to make tablespoon-sized balls. Roll the balls in between the palms of your hands until evenly formed (or close to it). Sprinkle some cacao powder on a plate and roll your finished truffles in it to coat them. You can also use hemp seeds, cacao nibs, or crushed hazelnuts for another alternative. 

Store in the fridge for several weeks or freezer for up to a month Enjoy! 

Love Your Body with this Lemony Roasted Beet Tahini Dressing

Lemony Roasted Beet Tahini Dressing

While Valentine's Day may look like snuggling up with your sweetie and some chocolate-covered strawberries, it might also look like carving out a little extra time for some intentional self-care - like cooking a nourishing meal for yourself made with love. Eating well is one of the most loving things we can do for ourselves - by giving our body the proper nutrition we are able to have the energy and health it requires to live our best life and keep working towards our dreams. We're all worthy of that!

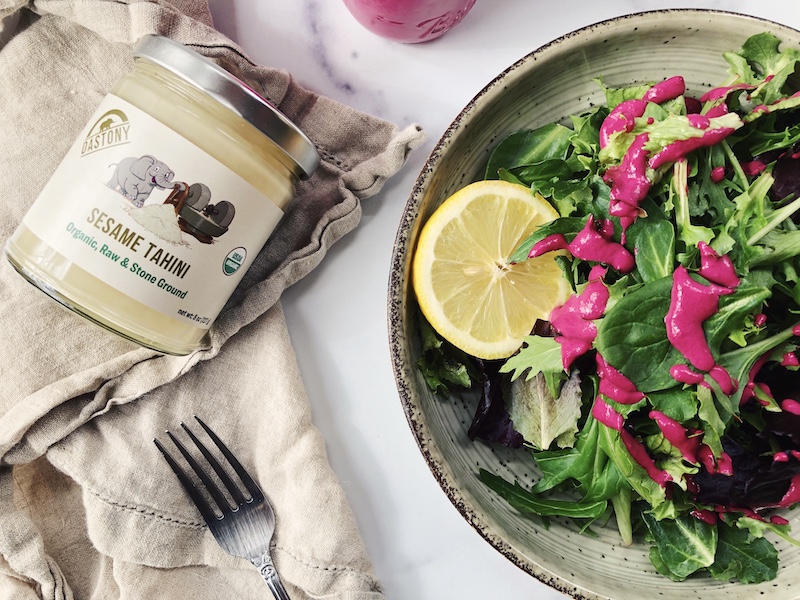
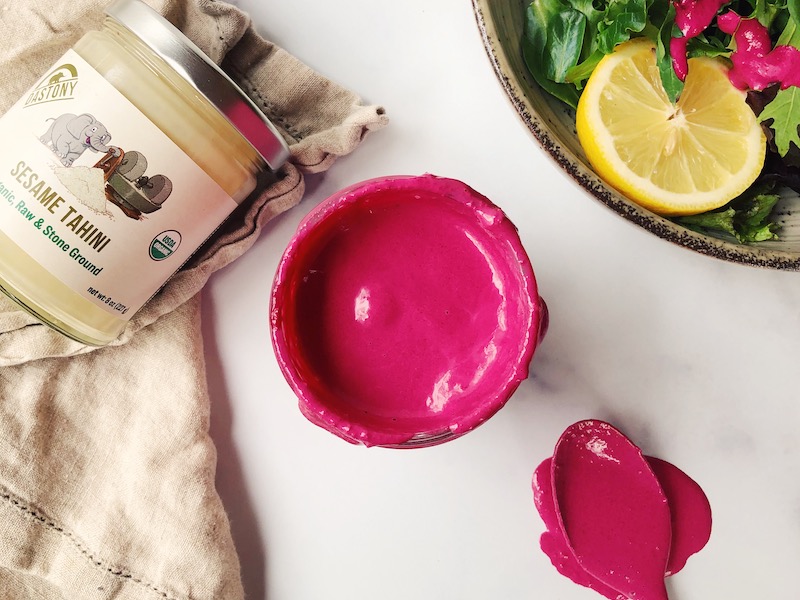
This vibrant dressing will definitely make eating your greens a joy - it's creamy and lemony with a pop of garlic and cumin. The sweetness from the roasted beet helps balance out the slight bitterness of the sesame tahini, and it also gives the dressing a vibrant pink color which will really help dress up your salads and bowls, or your Instagram feed if you decide to take a pic. It's full of healthy fats and calcium from sesame seeds, and the beets add additional fiber and folate (vitamin B9), manganese, potassium, iron, and vitamin C. It's a fun and colorful variation of your classic tahini dressing we hope you love!

Lemony Roasted Beet Tahini Dressing

The Recipe

Lemony Roasted Beet Tahini Dressing

Ingredients

1 cup Dastony raw sesame tahini

1/2 cup chopped beet, roasted (about 2 small beets

1/2 cup + 1 tbs lemon juice

1 cup filtered water

2 tsp toasted sesame oil

2 cloves fresh garlic

1 tsp Himalayan pink salt

3/4 tsp cumin

Instructions

1. Preheat your oven to 425F. Prep your beets by scrubbing and peeling, then chop in wedges and roast with avocado oil for 30-40 minutes until tender when poked with a fork. 


2. Blend the roasted beet and all remaining ingredients in a blender or a food processor until smooth and creamy. If you prefer a thinner dressing add a few spoonfuls of water until the desired consistency is reached. 

Serve the dressing over mixed greens, with roasted veggies, or as a sauce over a hearty rice or quinoa bowl. You can also use it as a sandwich spread - just add less water for a thicker consistency. This dressing will keep up to a week in an airtight glass container in the fridge.

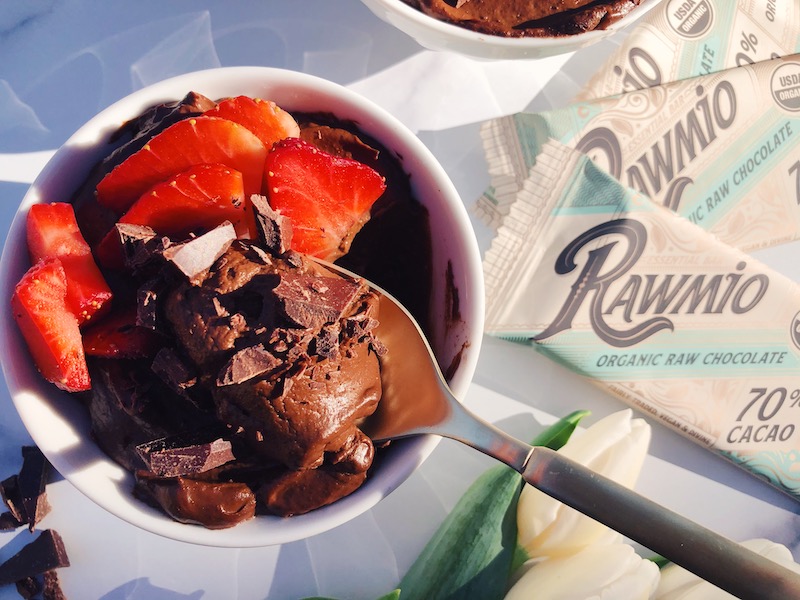
The Perfect Treat for Valentine's Day: Raw Chocolate Avocado Mousse

Valentine's Day Raw Chocolate Avocado Mousse

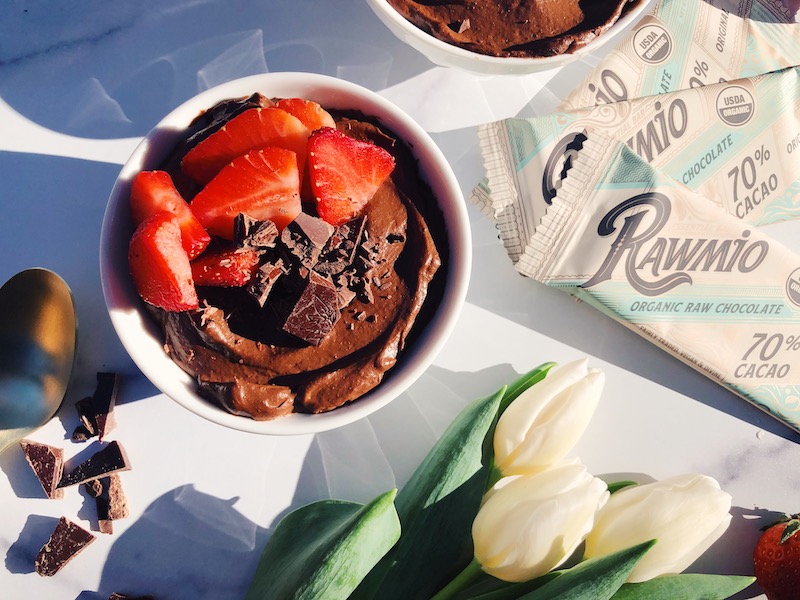
This Raw Chocolate Avocado Mousse is not only a great option for a special V-Day treat, but it's also one of the easiest and tastiest dessert recipes imaginable perfect for just about any time - especially if you're a lover of all things dark chocolate. This creamy and rich chocolate mousse leaves nothing for want. Yes, it's made with superfood-status ingredients like fresh avocado and our 70% dark raw chocolate bars, but it still manages to excel in the decadence department with its creamy, rich texture and impressive flavor that truly is like a traditional chocolate mousse - only without the refined sugar, whipping cream and eggs.

We know what you're probably saying - "Stop right there. You said avocado?" Yep, you heard right!

Before you start visualizing a bowl of chocolate-flavored guacamole, hear us out.

Avocados may be delicious in savory recipes - but their richness, creaminess, and naturally buttery texture are all qualities that are completely dessert friendly-too. Avocados are what make this chocolate mousse smooth, thick, pudding-y, and completely decadent. And thanks to this versatile green fruit (yep, avos are a fruit!) this recipe is also loaded with healthy fats, fiber, and plenty of vitamins as well.

And the health benefits don't end there. Since this mousse is made with raw cacao and raw chocolate, it's also packed full of antioxidant flavonols and magnesium as well, two nutrients that support a healthy cardiovascular system, so you can nourish your physical heart while you express your love.

Valentine's Day Raw Chocolate Avocado Mousse

The Recipe

Raw Chocolate Avocado Mousse

Serves 4

3 medium avocados - make sure they’re soft but not overripe
2/3 cup raw cacao powder
1/2 cup maple syrup
1/2 cup coconut cream
3 70% dark raw chocolate Essentials bars, melted *Leave a few sections out to chop and sprinkle on top
1/2 tsp vanilla extract
2 large pinches Himalayan salt

Instructions 


1. Using a double boiler method, gently melt the 70% raw chocolate by breaking apart the bars and placing it in a heat-safe bowl over hot water. Be sure to leave out a few sections to chop and sprinkle on top for garnish.

2. Place all ingredients in a food processor or blender, and blend until smooth and mousse-like. If using a blender place your liquid ingredients in the blender first to help the blades catch. Add a splash more coconut cream if needed. 

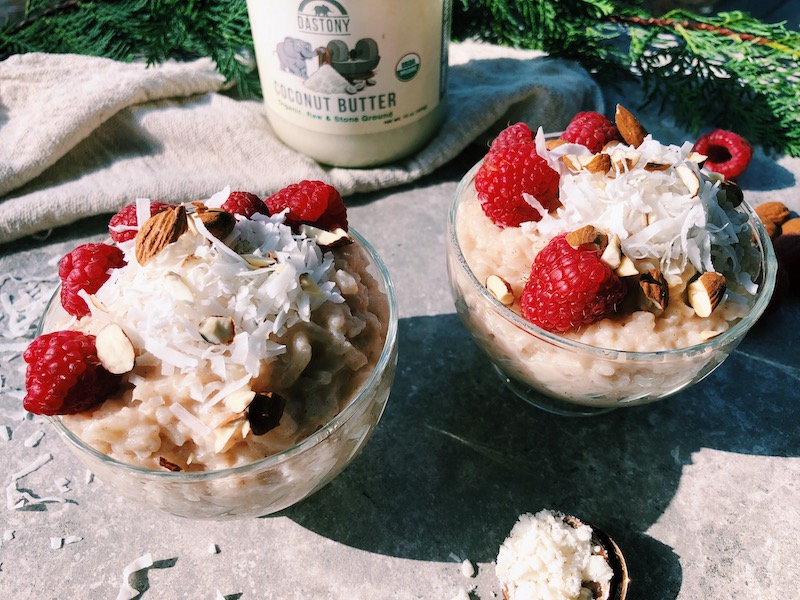
Easy Stovetop Vegan Coconut Rice Pudding

Vegan Coconut Rice Pudding

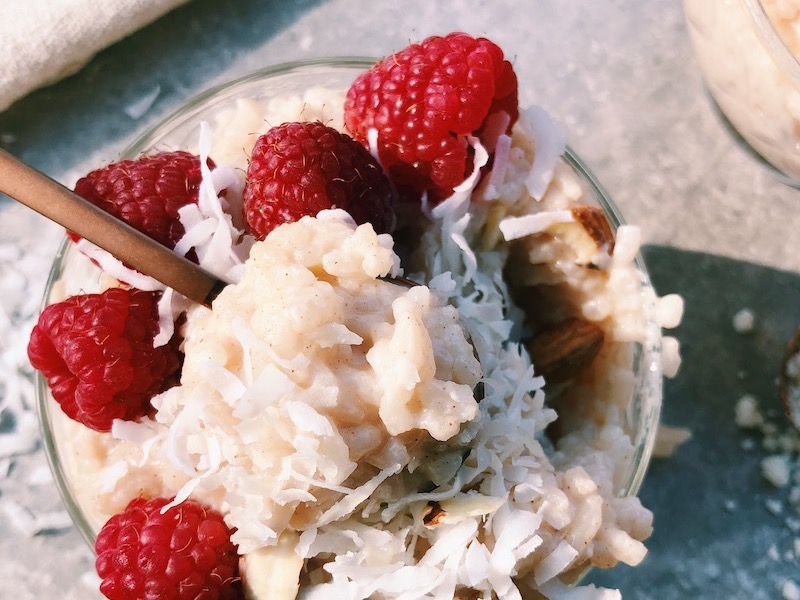
Not sure what to do with all that leftover rice from last night's stirfry? We've got the perfect solution: make a delicious vegan coconut rice pudding! It's soft, creamy, and custardlike - without using dairy or eggs. And the best part ... it can be eaten for dessert or breakfast. In fact, it's a great sub for oatmeal if you find yourself bored with your usual hot cereal recipe. It's loaded with the flavors of coconut, cinnamon, and vanilla and is such a cozy, comforting-yet-healthy treat for chilly winter days.

You can also easily customize this recipe - use your favorite spices and plant milk of choice. The stone-ground coconut butter melts into the rice and almond milk while it's cooking, giving it that ultra-creamy texture and deliciously sweet coconut flavor - no coconut milk needed. Top with your choice of fruits or drizzle with nut butter or chocolate sauce (if desired). Don't be afraid to put your own spin on it!

Vegan Coconut Rice Pudding

The Recipe

Stovetop Vegan Coconut Rice Pudding

Serves 3

Ingredients

12 oz unsweetened almond milk
1.5 cups cooked white jasmine rice*
2 heaped Tbs Dastony stone ground coconut butter
2.5 Tbs maple syrup
1/2 tsp vanilla extract
Dash or two of cinnamon

Optional: Dash of cardamom and/or nutmeg

*We recommend white jasmine rice over other types of white rice because it has a very delicate, floral taste which lends well to sweet recipes like this one.

Instructions

1. Place almond milk, cooked rice, cinnamon, vanilla extract, and maple syrup in a small pot and bring to a low boil. 

2. Reduce heat and let simmer on medium-low heat for about 7 minutes, stirring continuously so the rice doesn't stick to the bottom and burn.

3. Add coconut butter, stir well, and continue to cook for 3 more minutes while stirring. 

Top with fresh fruit, shredded coconut, nuts and seeds, or anything your heart desires! Can be kept in the fridge and re-heated with a little splash of nut milk to make it creamy again. 

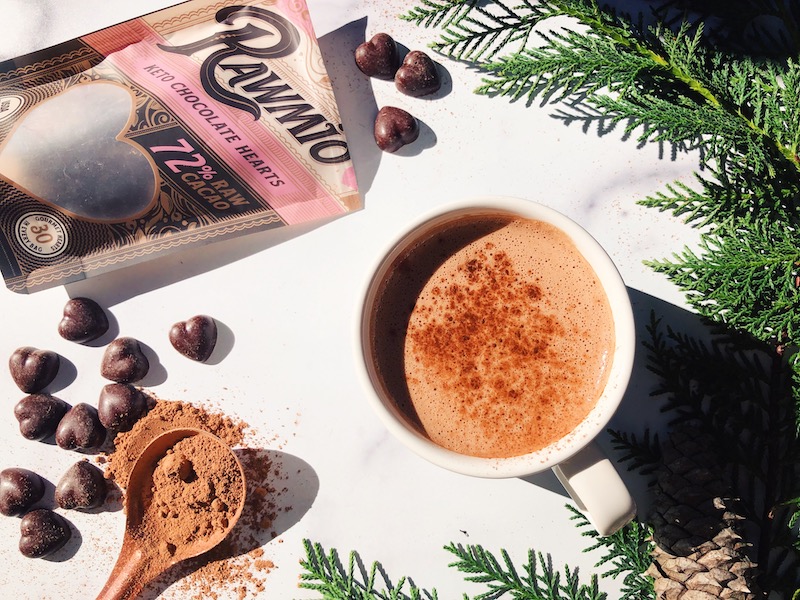
The Ultimate Keto Hot Chocolate Recipe (Less Than 1 Gram Sugar per Serving!)

The Ultimate Keto Hot Chocolate

One thing is for certain, you don't have to be following a strict keto diet to enjoy this delicious, antioxidant-packed hot chocolate recipe. Yes, it may contain less than 1 gram of sugar per serving (say what?!) all the while not compromising on sweetness, creaminess, and sheer decadence - but anyone can enjoy this recipe, including those who simply want to find creative ways to cut down on sugar without giving up their favorite treats.

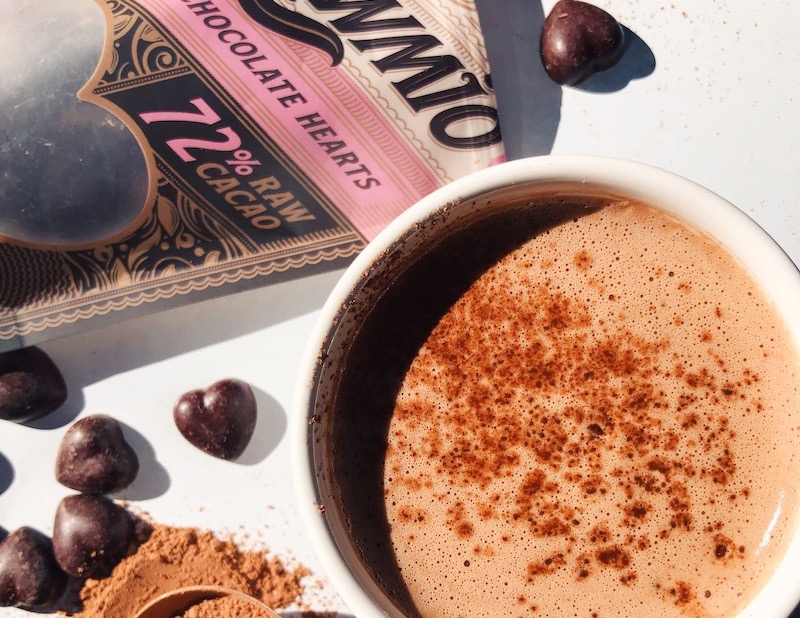
This hot chocolate recipe is made with a combo of unsweetened almond milk and coconut cream to give it that perfect creamy texture without the use of dairy, raw cacao powder instead of processed cocoa powder for a more nutrient-rich option, monk fruit sugar to sweeten (a zero sugar, plant-based sugar alternative), and Rawmio's new keto-friendly raw chocolate hearts to give it even more dark chocolate flavor and added richness. You will not regret curling up next to the fire with a mug (or two!) of this yummy hot chocolate on a chilly winter's day. 

The Ultimate Keto Hot Chocolate Recipe

The Recipe

The Ultimate Keto Hot Chocolate

Serves 1

Ingredients

12 oz unsweetened almond milk

1/4 full-fat coconut milk (coconut cream)

6 Rawmio Keto Raw Chocolate Hearts

2 Tbs raw cacao powder

4 tsp monk fruit sugar (or erythritol or both)

1/4 tsp vanilla extract

Dash Himalayan salt

Optional: a dash of cinnamon, cayenne or extra cacao powder (or all three) over the top before serving. 

Steps

1. Blend all ingredients except raw chocolate hearts until well-mixed. 
 
2. Pour mixture into a saucepan over medium heat. 
 
3. Add keto raw chocolate hearts to your pan and let them melt while stirring continuously. Heat to the desired temp and enjoy! 

These Savory Tahini Mashed Sweet Potatoes are the Perfect Simple Side Dish

Savory Tahini Mashed Sweet Potatoes

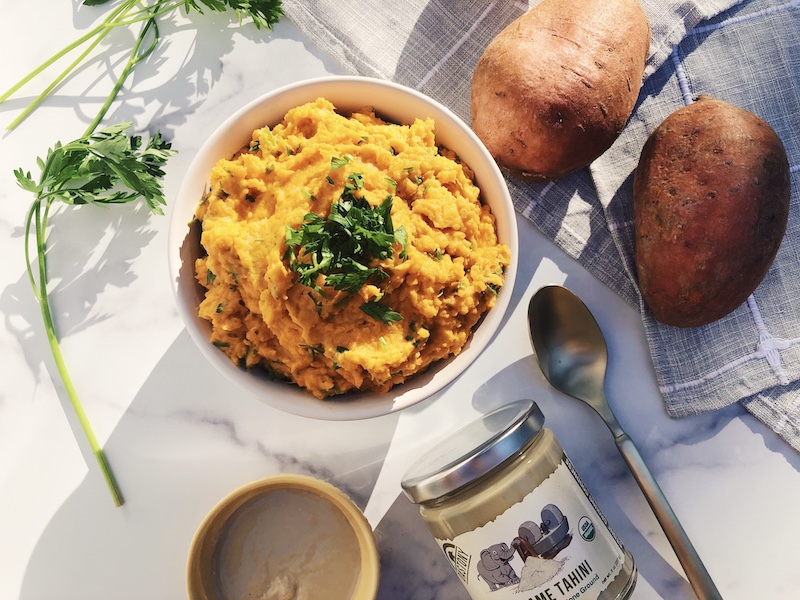
Looking for a healthy and simple side dish to add a little extra nutrition and pizazz to your Thanksgiving menu? These Savory Tahini Mashed Sweet Potatoes are a perfect option.

While it's certainly common to see sweet potatoes on the Thanksgiving table, they're most often served in sweet recipes like casseroles with caramelized marshmallows on top. This recipe taps into a more savory side of sweet potatoes, balancing out their inherent sweetness with creamy raw sesame tahini, coconut oil, Himalayan salt, and a touch of garlic and fresh parsley. It's a very simple recipe with only 6 main ingredients (+ salt and pepper) and it's also vegan and paleo-friendly! Sweet potatoes are naturally packed full of valuable nutrition - they're one of the best sources of beta carotene and potassium in the plant kingdom, not to mention they're loaded with gut-healthy fiber and slow-burning carbs. We think it's safe to say we could all benefit from a few more healthy dishes this time of year. Plus, if your taste buds are not yet familiar with the divine combination that is sweet potatoes + tahini you're in for a real treat. 

Savory Tahini Mashed Sweet Potatoes

The Recipe 

Savory Tahini Mashed Sweet Potatoes
 
Serves 4-5
 
Ingredients

4 small-medium or 3 large sweet potatoes, peeled and cubed 
2 Tbs coconut oil (or vegan butter)
2 cloves garlic, pressed or minced
4 Tbs Dastony raw sesame tahini
1/3 cup chopped parsley
1 Tbs fresh lemon juice
1/2 tsp fine Himalayan salt - or more to taste
Freshly ground black pepper to taste
 
Optional for serving: chopped green onion, more parsley, and a drizzle of tahini

Steps

1. Place the peeled, cubed sweet potatoes in a large pot with enough water to cover by about 1″. Add a few dashes of Himalayan salt and bring the mixture to a simmer over medium-high heat. 
 
2. Reduce the heat and simmer, uncovered, for about 9-12 minutes, until done. You should be able to slide a fork into the potato easily.

3. Drain well, then place your cooked potatoes in a large mixing bowl with coconut oil (or vegan butter) and raw sesame tahini. Mash with a fork or electric mixer until you reach your desired consistency. Add lemon juice, garlic, salt, and pepper - mix again. Then add chopped parsley last and stir by hand. Reserve some parsley for a garnish.  

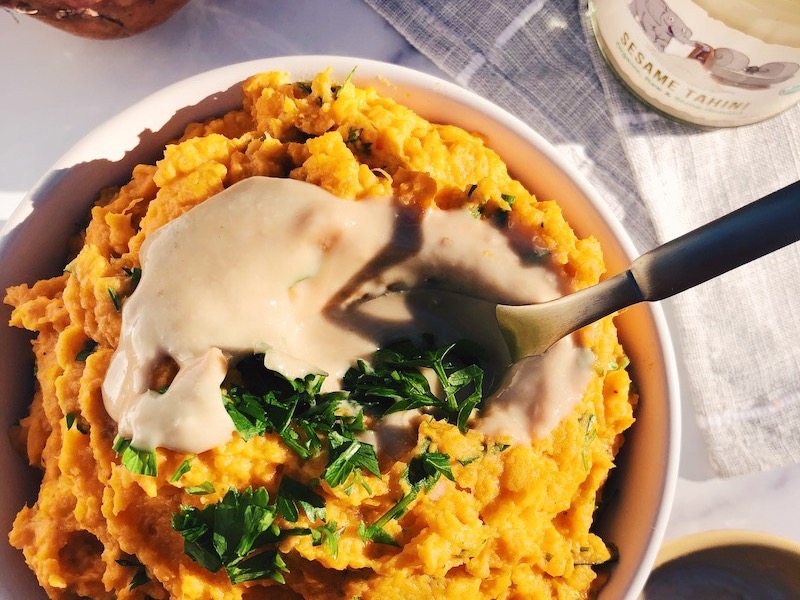
4. Transfer the mashed sweet potatoes to a serving bowl and serve with a sprinkle of extra parsley and/or chopped green onion. Optional: drizzle the top with a little extra tahini. 

Serve promptly. Leftovers can be kept in an airtight container in the fridge for 3 to 4 days, and reheated before serving.